


July 15, 2026
Let’s talk about something that most founders forget about or let’s be honest, have no idea how to create: your email signature.
Every single email you send is a touchpoint and if every email ends with a bland “Best, [Insert Your Name]”, you are missing out on a great opportunity to continue your brand recognition.
The good news is you don’t need a developer or any fancy tool to create your branded signature. You just need Google Docs, Gmail, and about thirty minutes. Below I will walk you through two ways that you can create your branded email signature.
Method one: the reliable route
This one takes a bit more setup, but it’s the version I actually recommend to clients because it holds up. The trick is hosting your images somewhere public instead of pasting them straight from a Google Doc, which is where signatures tend to fall apart later.
Host your images first. Upload your signature graphics to a page on your own website that isn’t linked anywhere (this keeps it out of your main navigation while still making the images public). If you use ShowIt, you can actually upload images directly into the media uploader and grab the link from there.
If you don’t have a website yet, you can use a free host like Imgur or Postimages. Grab the direct URL for each image once it’s uploaded. One important note here is that the images need to be public. If they’re private or behind a login, they won’t load for anyone but you.
Build your layout in Google Docs. If your design has more than one column, like a logo next to your contact details, you’ll want to build that structure with a table. Open a new doc, go to insert, then table, and choose your columns. Once it’s built, change the border color to white so it disappears visually. Copy the table when you’re done.

Bring it into Gmail. Open a new blank email and paste your table in. From there, use insert photo by URL for each image (this pulls the hosted version in rather than embedding a local file, which is the part that tends to break). Add each graphic one at a time and resize as needed to keep things balanced. A good rule of thumb: your whole signature should fit in three to five rows. If it’s extending past that, trim it down.
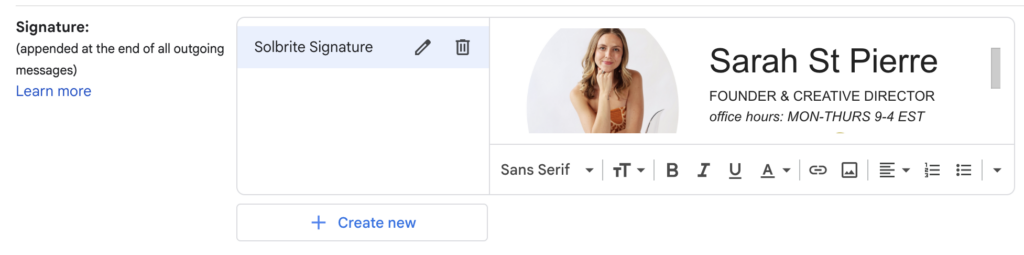
Move it into your actual signature settings. Head to Gmail settings, then see all settings, then general, then scroll to signature and create a new one. Paste your finished design in. Then go back and highlight each image or icon individually to add its link, whether that’s your website, your Instagram, or a booking page.
Test it everywhere. Send yourself test emails across Gmail, Outlook, Apple Mail, and your phone if you can. Confirm images load, links work, and nothing collapses on mobile. If images aren’t showing up for recipients, it’s almost always a hosting problem. Switch hosts or move the images to your own site and try again.
Why go through all this? Because externally hosted images are far less likely to break, and this method plays nicer across the wide range of email platforms your contacts are actually using.
Method two: the Google Doc shortcut
Here’s the faster version. Build your signature in a Google Doc, then paste it directly into Gmail. Fair warning, it can be a hit or miss. I used to rely on this but, my images stopped copying over into the email and I was stuck with a broken linked image. Some days it works perfectly, other days Google decides not to cooperate. Still worth trying first since it’s so much quicker, but if it doesn’t work, you can fall back to method one above.
Build your table. Create a two-column layout in Google Docs, logo on one side and your details on the other, or an image paired with social icons, whatever fits your design.
Add your images and format. Insert your exported graphics into the table cells and resize them. Set the borders to white so the structure stays invisible. Then align your text, adjust spacing, and style everything to match your brand.
Link it up. Highlight each image or icon and attach the right URL before you move on.
Paste into Gmail. Copy your finished table straight from Docs into the Gmail signature editor. Double check that sizing held and every link is still clickable, since this is usually where things slip.
A few rules worth following either way
A signature isn’t the place to show off everything you’ve got going on. Keep it tight: your name, your title, and a link to your main socials and website.
Stick to one or two fonts, and remember that any text typed directly into the signature (not baked into an image) will render in whatever default font the recipient’s email client uses, not your brand font.
Whatever you’re linking to, make it a real, dedicated page. If you’re sending people to a portfolio or a booking calendar, don’t make them dig for it once they click.
And resist the urge to stack everything you’ve got into one signature. A logo, three social icons, a legal disclaimer, and a quote at the bottom starts to look more like spam.
When something breaks
Images won’t show up. Nine times out of ten it’s a hosting issue. Move your images to your own website if you haven’t already.
Layout falls apart in Outlook. Outlook is notoriously picky with complex HTML. Simplify your structure and keep image widths on the smaller side.
Links stopped working. Re-add them directly in the Gmail editor. Pasting from Docs sometimes strips the link data even when everything else transfers fine.
Images are too big or slow to load. Re-export at a smaller pixel width and a lower file size before uploading again.
Your email signature is one of the few places where your brand shows up automatically, every single time, without you having to think about it. Once it’s built right, you never have to touch it again.
Is your brand bold enough to stand out or are you blending in?
Your brand is either pulling dream clients in or quietly pushing them away; there's no in-between. In 4 minutes and 10 questions, you'll find out exactly which one yours is doing, what's holding it back, and one shift you can make.


